Dockerizing Your Product

So you are planning to containerize your product. You read the Docker docs, watched few videos and played around with basic Docker commands. But you are wondering, now what? How do you start containerizing this monolithic, legacy, enterprise product?

Here are few steps that could help you through the process and get you a starting point. This would be a three part article. This part covers the information you need to gather before starting to write the Dockerfile.

Understand the Product Installation

In this section, we’ll talk about the research you need to do and data that you need to collect which will be useful later while creating the Dockerfile and other scripts.

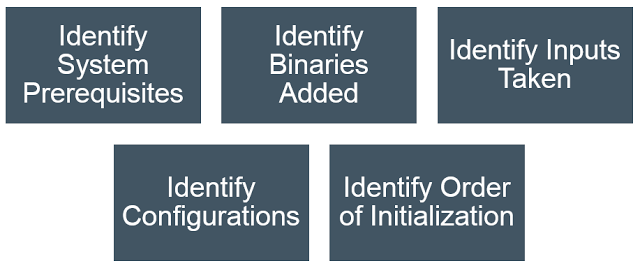
1. Identify System Prerequisites

Best place to start is look for the System Requirements section of the Product Documentation. Go find the documentation. Pray you have one.

Note the base OS on which the product is deployed. If you support multiple operating systems, start with the most popular Linux based OS on which the product is deployed. Docker on Windows is still at nascent stage and you don’t want to add one more unknown parameter in your research. Prefer Debian based OS like Ubuntu just for its ease of package management and installation.

Identify additional software and libraries which your product assumes to be present on the system before you being the product installation.

Also note the sizing guidelines for the server on which you deploy the product. Note the memory, CPU requirements. Preferably start with the smallest size supported.

2. Identify Binaries Added

What software are installed when you deploy or install the product? Are there third party software bundled with the setup. Transitive dependencies? Do you need JRE?

3. Identify Inputs Taken

What inputs do you provide during the installation process? What are the default values during silent installation? What things are assumed and currently not configurable?

  1. DB details - Server details, DB credentials
  2. User credentials
  3. Installation location - location to put the binaries
  4. Product configurations - log level, heap sizes etc

4. Identify Configurations

Where are the product configuration files stored? What all things are configurable? What are the default values? What configurations are asked to the user during installation?

5. Identify Order of Initialization

Does your product spawns multiple processes or daemons running in background? What are they? In what order are those started? In what order do they stop?

Do not think about splitting the product right now. You would do it eventually, but not now. Right now the focus is on getting the product containerized.


Software Design Document Template

Many organizations, new and old, struggle to come up with a descent Software Design Document Template for the teams to follow. I plan to provide a template with various sections that could be considered while working on the software design. Not all sections may be applicable for each feature. Developer/Architect should pick up the relevant sections.

Contents

1. Introduction

Provide context for this architectural change or new feature.

2. Related Documents

Point to related User Stories in AGM, defects, wiki pages, research/approach wiki/docs, attachments (PPTs, Docs).

3. Definitions

Terminologies, Acronyms and their meaning, description etc.

4. Limitations of Current Product Functionality and Architecture

Limitations, Drawbacks, Defects, Issues etc. in existing product before implementing this feature/story.

5. Solution Highlight

Executive summary of architectural changes and/or new features. Along with section 4 (above), the reader should be able to understand the problem being solved, business context of the problem and how it is intended to be solved.

6. Acceptance Criteria

Identify the acceptance test criteria. This could include development test suite, smoke tests suite etc.

7. Functional Design

Use this section on highlight WHAT functionality is to be introduced/changed within the product. Provide details about the use cases, actors, scope etc. Below two sections combined should be able to capture clear understanding of the functionality from engineering point of view.

  • Itemized Functionality

    Describe each new functionality to be introduced, explaining how an use case would be achieved.

  • User Visible Changes

    • GUI Changes

      Use mock ups, screenshots, wire frames to show new GUI to be implemented. Highlight new changes in comparison to old GUI. Include error/warning/validation messages.

    • CLI Changes

      Describe CLI additions/changes, syntax changes, options/parameters meaning, environment variables (if any), input, output, error messages etc.

    • API Changes

      Describe additions/changes to any public APIs like REST etc.

    • Configuration Changes

      Describe changes to customer visible configuration file changes.

    • Installer Considerations

      Identify new screens/cli questions to take input from the user during installation. Identify new directories and files that will be introduced and there location within installer and application. Also describe config files/registry settings/environment variables changes that would take place. Need for system/component reboot etc.

    • Documentation Changes

      Identify documents that needs to be updated and brief summary of the changes.

8. Architecture

High level architectural changes. Highlight what changes will be introduced as compared to existing architecture using old/new diagrams or colors/sections within the diagram. Following diagrams, as appropriate, can be used:

  • Context diagram

    A very high-level diagram showing your system as a box in the center, surrounded by other boxes representing the users and all of the other products/systems that the software system interfaces with.

  • Container diagram

    A high-level diagram showing the various web servers, application servers, standalone applications, databases, file systems, etc that make up your software system, along with the relationships/interactions between them.

  • Block/Component diagram

    One per container, showing major components and their relationships.

9. Implementation Design

  • Domain Model Design

    Relatively detailed design of the code/solution. Explain new classes introduced, classes which underwent major changes, design patterns used etc. Following diagrams, as appropriate, can be used:

    • Class Diagram

      Explaining implementation of particular component. Also can be used to explain design patterns and future extensibility.

    • Collaboration Diagram

      Showing high level communication between objects.

    • Sequence Diagram

      Showing complex interactions between objects over time.

  • Data Model Design

    Relatively detailed design of the new tables/columns. Explain purpose of each table/column, when/who/how of CRUD operations, normalization considerations etc. Also mention affected files (sql, xml, scripts). Following diagrams, as appropriate, can be used:

    • Entity Relationship Diagram

      Showing relationship between the new tables/columns introduced.

    • CRUD Table

      Chart showing CRUD operations performed by various processes on entities.

10. Development Considerations

  • Deployment

    Describe hardware, system requirements and other deployment configurations like ports opened, firewalls etc.

  • Upgrade

    Describe upgrade steps and files affected. Consider existing configuration files and data during upgrade. Also consider backup and rollback action plan.

  • Migration

    Describe database migration plan. Explain tables affected, steps for migrations and scripts/tools involved. Also consider backup and rollback action plan.

  • Import/Export

  • Reports

  • Compatibility

  • Scalability and Performance

  • Security

  • Internationalization

11. External Dependencies, Blockers and Risks

12. Approvals

  • Dev Manager

  • QA Manager

  • Product Owner

  • Tech Pub Manager

  • Solution Architect

  • Product Architect

  • Support Manager

  • UX Manager


Introduction to Boost

Recently I gave hands-on Introduction to Boost in C++ Meetup held in Pune. The session went pretty well with 20-25 folks attending it on a Saturday morning.

I covered three Boost libraries:

  1. Lexical Cast
  2. Optional
  3. Any

I had intentionally selected header-only libraries so that the audience could start coding along with me without having to build the Boost.

Here are the slides that I had prepared:

I have also uploaded the code generated during the live coding session: https://github.com/rockoder/boost-hands-on


RHEL7 Provisioning

Recently I had been working on adding support for Red Hat Enterprise Linux 7 (RHEL7 / RHEL 7) baremetal provisioning into our product. There are few changes in the process from RHEL6. Unfortunately, since RHEL7 has GAed recently, there is not much information on the internet regarding a workable kickstart file. This blog describes the challenges that I faced and how I resolved them.

The Setup

Most likely you would be using virtual environment for doing your research. If you are using VMware vSphere, note the you would need ESX 5.5 for this. Because that’s the version which supports RHEL7. Also you would need to use vSphere web client (and not the desktop client) to get the RHEL7 option while VM creation.

This VM, PXE server, TFTP server and DHCP server should be in same network. Mostly you would create a private network as you do not want these servers to interfere with your usual servers (like DHCP server). This can be easily done in vSphere.

With this setup in place, I started my first RHEL7 provisioning job using the existing RHEL6 configurations and kickstart file. Kickstart file contained all the packages that were supported in RHEL6.

Network Device Error

I provided the kickstart network device (as eth0) and dynamic IP address.

First failure I got was with this warning:

dracut-initqueue[679]: Warning: Could not boot.
dracut-initqueue[679]: Warning: /dev/root does not exist

And I got the dracut prompt.

After some investigation, I found that the issue was with the eth0 that I had provided as kickstart network device. RHEL7 renames the device in different format. For ex in above screenshot you would find the name as eno16780032. Providing this name instead of eth0 solved the error.

You could also use the MAC address but somehow for me it did not work in hyphen format (-). MAC address in colon (:) format worked fine. Ex: XX:XX:XX:XX:XX:XX

Kickstart File Syntax

Next error was due to the ‘key –skip’ entry in my kickstart file. Latest Anaconda refuses to recognize this option. I just removed this entry to proceed with my investigation.

Further the setup cribbed about no matching %end for %package in kickstart file. This was allowed earlier but now the format needs you to close the %package, %pre, %post etc with matching %end tag.

Refer Troubleshooting Kickstart files in RHEL 7 for more information.

Web Server Error

When it looked like that I got the kickstart file syntax correct, the installation started giving me following error: error populating transaction after 10 retries: failure: Packages/libstdc++-4.8.2-16.e17.x86_64.rpm from anaconda: [Errno 256] No more mirrors to try.

Not much help from the error message. This one was tricky to resolve.

The hint was in ‘c++’. Why are we getting error for this particular package and not for any other package? Whats so special about c++? The special thing is two consecutive special characters.

My datastore, where the ISO content were located, was accessed through http protocol. For this I was using IIS server. I quickly tried to access above rpm from my browser and there I got the error. The error was only for this rpm and not for any other rpm. Little more investigation and found the root cause.

By default IIS does not allow double escaping of special characters. There is a setting in IIS to enable ‘Allow double escaping’. After doing this, my installation proceeded further.

New RHEL7 Packages

Lastly the setup went into interactive mode for few package groups which were no longer present in RHEL7. Since I was reusing RHEL6 kickstart, I had to make changes in the selected packages to make it run for RHEL7. Complete list of packages that had to be modified from RHEL6 to RHEL7 is as follows:

@virtualization  -  @virtualization-hypervisor
@cifs-file-server  -  @file-server
@nfs-file-server  -  @file-server
@mysql    -  @mariadb

@mysql-client  -  @mariadb-client
@server-platform  -  removed
@storage-server  -  removed
@turbogears   -  removed
@basic-desktop   -  removed
@desktop-platform  -  removed
@general-desktop  -  removed
@tex    -  @texlive

There are many other packages and there could be other changes in the packages. However we support only few selected packages and hence I had to keep my research limited to the same.

Automation of Post Install Tasks

You may be interested in executing onetime tasks after the system boots for the first time (similar to run once in Windows). We achieve this by creating a script using echo commands in %post, which is executed after reboot by adding the entry into /etc/rc.d/rc.local.

Somehow this didn’t work for RHEL7. The reason was that the /etc/rc.d/rc.local didn’t have execute permissions by default. Workaround was to add chmod command in the %post section to give it execution permissions:

chmod +x /etc/rc.d/rc.local

Additionally if you intend to execute any 32-bit binary file you would need the correct glibc installed on the system. Following commands in %post did the trick for me:

wget http://location_to_iso_extract/Packages/glibc-2.17-55.el7.i686.rpm
rpm -ivh glibc-2.17-55.el7.i686.rpm --nodeps

Sample RHEL7 Kickstart file

Finally here is the sample kickstart file that worked for me. Notes that I focus was on automating the provisioning process and not on providing the best values in the kickstart file. For ex below kickstart has ext3 as the fstype which may not be the preferred choice in real world scenario. Similarly for enablemd5.

install
text
timezone --utc Africa/Abidjan
lang en_US
keyboard us
network --bootproto dhcp --device ??NET_DEVICE?? --hostname ??HOST_NAME??
url --url http://??DATA_STORE_IP??/??DATA_STORE.VIRTUAL_DIR??/rhel-server-7.0-x86_64-dvd
firewall --disabled
zerombr 
clearpart --all
bootloader --location=mbr
part / --size 1 --grow --fstype ext3
rootpw --iscrypted ??ROOT_PASSWORD??
auth --useshadow --enablemd5
reboot
%packages
@base
@x11
@web-servlet
@emacs
@network-file-system-client
@legacy-x
@virtualization-hypervisor
@virtualization-platform
@system-admin-tools
@php
@system-management
@security-tools
@graphics
@input-methods
@web-server
@backup-server
@print-client
@console-internet
@file-server
@virtualization-tools
@development
@mail-server
@smart-card
@desktop-debugging
@fonts
@postgresql-client
@core
@performance
@postgresql
@compat-libraries
@directory-server
@dial-up
@mariadb-client
@mainframe-access
@scientific
@graphical-admin-tools
@network-server
@print-server
@directory-client
@remote-desktop-clients
@ftp-server
@network-tools
@debugging
@kde-desktop
@backup-client
@mariadb
@virtualization-client
@perl-runtime
@java-platform
%end
%post
# You can enter commands to perform post install operations here.
%end


How to manage emails in MS Outlook

We use Outlook in our office for all the email communication. And each day I spend considerable amount of time reading and responding to mails. I have tried many different approaches to manage emails efficiently - creating folders, applying rules and filters, setting categories, setting flags, Outlook plugins and so on. Some of them have helped. But I always lagged behind the incoming rate of mails. Sometimes I ended up spending my weekend in cleaning up my inbox. Sometimes I was late to respond and sometimes even miss out on the mail completely.

Over period of time, while continuously trying new things, I have settled down to the process which has not only increased my effectiveness (like giving timely response to mails, not missing out on any mail) but also efficiency (by taking more incoming rate of mails by subscribing to more mailing-lists and contributing to the discussions).

In this post I’ll try to describe the process that has worked for me. First I’ll talk about all the settings that I have done in my Outlook and then I’ll describe the process or flow that I follow for every mail using those settings.

1. The Settings

1.1. Keep mails unread unless you explicitly mark them read

To be in control of your mails, you should be explicitly marking the mails as read when they are really read. Letting Outlook do it for you is recipe for missing out on mails. I figured this out the hard way.

So first thing is to change the Outlook settings. To do this in Outlook 2010, go to View -> Reading Pane (in Layout) -> Options. Following window should pop up. Unselect first two check boxes.

These two check boxes, if checked, marks the mail as read automatically. This caused my mails getting marked as read even when I had no intention to do so. This resulted in missing out on important mails and action items. I had to explicitly mark a mail as unread, if I wanted to revisit it again and that was error prone and not so convenient.

Now that all mails will remain unread as long as we don’t explicitly mark them read, here’s a simple rule to follow: A mail will remain unread as long as there is an action item pending on it. An action item can be: just reading the mail again, actually performing some action and/or replying the mail, waiting for some event to happen etc.

1.2. Get rid of all the folders

‘Folders’ is more work. You have to go to every folder to check mails. And if the folder contains not-so-important-mails (mails from some forum you would like to contribute), you might just not check mails in that folder.

Also if folder already contains unread mails, its difficult to know if new mail has arrived unless you remember previous unread mails’ count or you actually go to that folder.

I had rules which would put incoming mails to folders based on various criterion. Most of the time I simply forgot to check mails in these folders. I only went to them occasionally to delete all the mails and clean them up.

I had many such folders and they were kind of hiding the mails from me.

Now all my mails either go to my Inbox folder or directly go to Deleted Items folder. That’s it - just one more location to look for mails other than the Inbox. And it is pre-created.

Note that even though a mail goes directly into Deleted Items folder, it is still unread, which means I still have an action item on it.

1.3. Create Rules to move mails to Deleted Items

Action to be performed by all your rules will be to move the mail to Deleted Items folder.

All mailing lists, auto-generated mails, alert/notification mails etc go directly into Deleted Items. For ex: daily build pass/fail mails, check-in mail alerts, test case failures, forums where people ask for help etc. should go to Deleted Items. Rest all go into Inbox.

Again, mail remains unread at both the locations.

1.4. Create Categories and Search Folders

You are more likely to and comfortable to mark a mail as read when you know you will be able to find it if needed in future. So its essential to organize and categorize your mails in some way.

And the best way to organize the mails is to align them to your searching thought process. Just ask yourself: “How would I search this mail, if I needed it 1/3/6 months down the line?”. Create categories based on the answer.

Think about the categories which would be most helpful when you have to a search a mail in future. Don’t be shy to create as many categories as you want.

Main advantage of Categories over Folders is that you can assign multiple categories to single mail. So the same mail would be visible under multiple categories. This simply increases the chances of finding the mail.

I prefer manually assigning categories to a mail rather than setting them through some rule. This increases the precision and in turn increases the chances of finding the mail.

Also I find it useful to create categories based on work modules instead of based on sender’s mail-id.

After categories, create Search Folders for each category. This keeps your mails grouped for you to search/refer in future. It kind of replaces the Folders. But you use it mainly for searching. Like a said, a single mail can have multiple categories and hence it can appear in multiple search folders. It’s equivalent to ‘Label’ in GMail.

1.5. Create Quick Steps

In Outlook 2010 you can define ‘Quick Steps’ which performs set of actions on a mail.

Create two Quick Steps:

  1. Permanent Delete - This permanently deletes the mail.
  2. Read & Delete - This marks the mail as Read, Deletes the mail and send it to Deleted Items folder.

You can also assign short-cut keys to perform the Quick Steps defined.

1.6. Know your Server Settings

You should know few Server Settings applied to every mail box in your organization. For example, how long does a mail remain in Deleted Items folder before it gets permanently deleted, whats the auto-archive frequency etc.

In my case, a mail remains for 2 months before it gets permanently deleted from Deleted Items. Auto-archive happens every 2 weeks. A mail remains in Inbox for 2 months after which it is archived and moved to archive Inbox.

All this happens automatically based on archive and server settings and I don’t have to worry about it.

2. The Process

With all these settings in place, we are now ready to handle the incoming mails.

Any incoming mail will either go into Inbox or Deleted Items.

In Inbox, after reading a mail, I:

2.1. Delete Permanently

When I am sure the mail is irrelevant to me and I have no action item on it today or in future and I will never need this mail again. Example: Announcement mail of some upcoming sports event you are not interested or mail threads you are unnecessarily part of. For this, I use Quick Step defined in 5.1 above. Shortcut key: Shift + Del

2.2. Mark Read and Delete

When there is no action item pending on me but I might need the mail for reference in near future. That near future has to be less than 2 months. So this action is for mails which would become irrelevant after few weeks and are no longer required for long term reference. The mail goes into Deleted Items and would be permanently (auto) deleted after 2 months. Example: Weekly status report/defect report sent by somebody. For this, I use Quick Step defined in 5.2 above. Shortcut key: Ctrl + q, Ctrl + d

2.3. Mark Read

When there is no action item pending on me but the mail contains information which I might need in future. The mail remains in Inbox. I assign category/categories to the mail so that it would be easier to find it in future. If there is some trivial action item or follow up to be done, I also assign a follow up flag with reminder. But normally I use step 4 mentioned below for followups. Example would be: Mail contains information about workaround to be used for a particular product issue. Shortcut key: Ctrl + q

2.4. Keep the mail unread and in Inbox

When there is an action item on me. I might have to perform some task, reply to the mail or followup on the mail in a day or two or simply re-read the mail/attachments. For all such situations I keep the mail unread. And once the action item is done, I again perform one of the above three actions on the mail. Example: Mail asking to update the ETAs for defects on my name. I wont permanently delete this mail unless I go and update the ETAs in our defect tracking system.

In Deleted Items, after reading a mail, I:

  1. Delete Permanently - Reason same as 1 above. Shortcut key: Ctrl + d
  2. Mark Read - Reason same as 2 above. Shortcut key: Ctrl + q
  3. Move to Inbox - very rarely when the mail contains information or has action item on me. Once mail is moved to Inbox, follow the steps mention in above section. If you are frequently moving mails from Deleted Items to Inbox, its time to revisit your Outlook rules.

After replying to a mail, I:

  1. Mark Unread in Inbox - Reasons same as point 4 mentioned above i.e. there is still action item pending on me. Shortcut key: Ctrl + u.
  2. Mark Unread in Sent Items - when I am expecting a reply from someone else on the mail I just sent and until then there is no action item on me. Shortcut key: Ctrl + u. If you don’t want one more folder to track, just mark the mail as unread in Inbox.

Finally, change the view of your Inbox and Delete Items folders to view only unread mails:

This will keep your focus on the mails which has some action items pending on you. You would occasionally change this view, to search for some mails or view the mails marked read. But for most of the time you would only see the unread mails present in your Inbox and Deleted Items.

Some Parting Tips

  1. The process may sound complicated but once it fits in your brain, you would perform the actions in split second.
  2. Don’t be afraid to delete mails. Rarely, if you need a mail that you have permanently deleted, you can always request the sender or your teammate to resend it to you.
  3. When in doubt - mark the mail as read. Doubt should signify that there is no action item on you. If you can’t quickly decide whether the mail will be required in future or not, just mark it read. It will come up in search, if it is required.
  4. Familiarize yourself to the keyboard shortcuts and use them as far as possible.
  5. Never delete any mail that you sent. That goes without saying, but still.

I hope someone finds this useful. I would love to know if you have any better way to manage mails or have any suggestions to improve above process.